
Custom storm windows are a smart investment for homeowners looking to enhance energy efficiency, protect against harsh weather, and preserve the integrity of their original window frames. Whether you’re living in an older home or upgrading an existing structure, accurate measurements are critical to ensure the perfect fit and performance. In this guide, we’ll walk you through the exact steps to measure and order custom storm windows like a professional, helping you avoid costly mistakes and delays.
Why Custom Storm Windows Matter
Before diving into the process, it’s important to understand the value of custom storm windows. Unlike off-the-shelf options, custom units are built to fit your window openings precisely. This tight fit improves insulation, minimizes drafts, and enhances structural durability during extreme weather events. They’re especially useful for storm window replacement projects where standard sizes don’t match existing window frames.
Custom storm windows also maintain the aesthetic appeal of your home. They can be designed to complement architectural styles, which is particularly important for historic properties. Additionally, with the right material and glass options, they offer better noise reduction, UV protection, and condensation control than basic alternatives.
Tools You’ll Need
To measure for custom storm windows accurately, gather the following tools:
- Steel measuring tape (not a fabric one)
- Notepad or measuring worksheet
- Step ladder (if measuring higher windows)
- Level (optional, for checking frame squareness)
Always measure in inches and round to the nearest 1/16 for precision. Record all measurements carefully and double-check before ordering.
Step-by-Step Guide to Measuring Custom Storm Windows
1. Identify the Mounting Style
Storm windows are usually mounted in one of two ways: inside mount or overlapping mount. Inside-mount windows fit inside the window frame opening, while overlapping mount windows attach over the outer trim. Confirm which style your supplier offers and which is appropriate for your window casing.
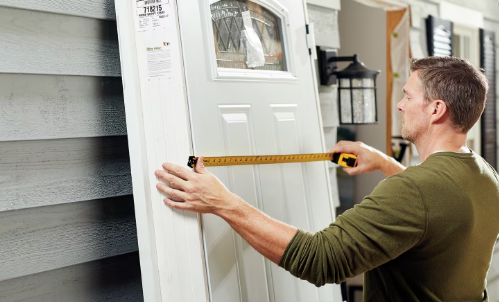
2. Measure the Width
Take three measurements: across the top, middle, and bottom of the window opening. Use the smallest measurement as your final width to ensure the window will fit within the narrowest section. In older homes, the frame may have warped over time, so this step is critical.
3. Measure the Height
Just like the width, measure the left, center, and right sides of the window opening. Record the shortest of the three measurements as your window height. Be sure to measure from the sill to the head jamb, not the trim or outside edge.
4. Measure Window Depth
Depth measurement ensures that the custom storm window will sit flush and not protrude awkwardly. Measure from the innermost part of the window casing to the outermost part. If any hardware or obstacles are present, note them. Most manufacturers require a minimum depth (typically around 1 inch) for proper fit.
5. Check Frame Squareness (Optional)
While not always required, it’s a good idea to check if the window frame is square. Measure diagonally from corner to corner in both directions. If the measurements differ significantly (more than 1/4 inch), let your supplier know, as they may need to make adjustments for fit.
6. Note Any Special Features
Are your windows arched, curved, or unusually shaped? Do they require ventilation panels or screens? Are they located in high-wind or coastal areas? This information is important when customizing your order. Also, decide whether you want single-pane or double-pane storm windows, and what type of frame material (aluminum, vinyl, or wood) suits your home.
Ordering Your Custom Storm Windows
Once you’ve gathered all your measurements, it’s time to place your order. Choose a reputable supplier that specializes in custom storm windows and provides detailed specifications and support. Some companies offer online order forms, while others prefer in-person consultations or phone orders.
Make sure you provide:
- Exact width and height measurements
- Mounting type (inside or overlapping)
- Frame color and material preference
- Glass type (e.g., low-E, tempered)
- Any special requests or notes on irregularities
Ask about lead times, return policies, and installation support. If you’re doing a storm window replacement, it’s especially important to verify compatibility with your existing openings and structural framing.
Professional Tips for Success
- Always double-check your measurements before submitting an order.
- Take photos of each window and label them to avoid confusion during installation.
- If you’re unsure about your measurements, consider hiring a professional to do the assessment.
- Keep a copy of your order confirmation and specifications for future reference.
Conclusion: Ready to Install with Confidence
Measuring and ordering custom storm windows may seem daunting, but with a careful and methodical approach, homeowners can achieve professional results. These windows offer more than just weather protection—they improve comfort, reduce energy bills, and preserve your home’s character for years to come. If you’re considering storm window replacement, especially in coastal or hurricane-prone regions, investing in custom options can significantly improve your home’s resilience. For those in high-impact zones, Florida storm windows exterior models are specifically engineered to meet local building codes and withstand extreme conditions, making them an ideal long-term solution. By following this guide, you’re well on your way to enhancing both the appearance and performance of your home with perfectly fitted custom storm windows.