
One of the most common sources of frustration in home exterior projects is poor timing. Homeowners discover damage, want it fixed immediately, and then find that good contractors are booked out for weeks and that the project itself takes longer than expected. Understanding the realistic timeline for a stucco project from first contact to completion helps set expectations and reduces stress.
Step 1: Initial Assessment (1–2 Weeks to Schedule)
The process starts with a professional evaluation of the existing exterior condition. Depending on the time of year and how booked your contractor is, scheduling an initial assessment may take anywhere from a few days to a couple of weeks. Don’t wait until damage is severe to start this process — getting ahead of the contractor’s busy season makes a real difference.
The assessment should cover the full scope of what’s happening on the wall, not just the most visible problem areas. A thorough evaluation is the foundation for an accurate scope and quote.
Step 2: Quotes and Decision (1–2 Weeks)
After the assessment, getting a written quote, reviewing it carefully, possibly getting a second opinion, and making a final contractor selection typically takes a week or two. Don’t rush this phase. Understanding exactly what’s included in the scope — preparation, materials, number of coats, integration work — is how you avoid surprises once the project begins.
Step 3: Scheduling the Project (2–6 Weeks Out)
Reputable stucco contractors are often booked several weeks in advance, particularly during the spring and fall seasons when weather conditions are ideal for exterior work. If you’re contacting a stucco company in Sarasota, FL during peak season, be prepared for the project to start a month or more after your contract is signed.
Emergency repairs for active water intrusion can sometimes be expedited, but planned renovation projects work best when they’re scheduled with adequate lead time.
Step 4: Preparation (1–3 Days)
Once the crew is on site, preparation begins. This phase involves removing damaged or delaminated material, addressing any underlying substrate issues, repairing or replacing damaged lath, and setting up proper integration at transitions. The duration depends on the scope of damage found during the assessment.
This is the phase where hidden issues sometimes emerge — moisture damage behind the stucco that wasn’t fully visible from the outside, for instance. Experienced contractors build some contingency into their schedule for this.
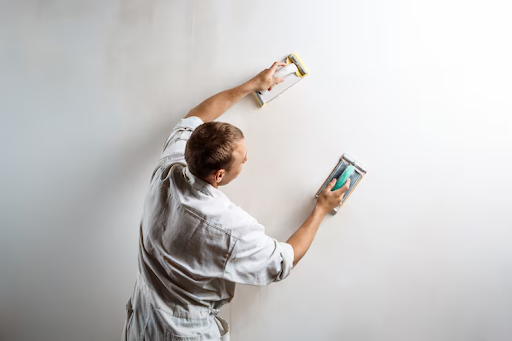
Step 5: Application and Curing (5–10 Days Minimum)
The three-coat application process includes mandatory curing time between each coat. The scratch coat needs 24–48 hours minimum before the brown coat goes on. The brown coat needs similar time before the finish coat is applied. Rushing these intervals is a shortcut that compromises the finished system.
Plan for the application phase to take at least a week, and potentially longer on larger homes or if weather delays interrupt the schedule.
Step 6: Finishing Details and Cleanup (1–2 Days)
The final phase includes sealing transitions, touch-up work on any areas that need attention after the finish coat is reviewed, and site cleanup. A complete walkthrough with the homeowner should happen before the crew leaves.
Total Realistic Timeline: 6–12 Weeks
From first contact to a completed project, six to twelve weeks is a realistic range for a mid-sized residential stucco project in the Sarasota area. Larger projects take longer; emergency repairs can sometimes be done faster.
The Florida Construction Industry Licensing Board recommends that homeowners obtain written contracts with explicit timelines before any work begins — a standard professional practice that protects both parties and keeps the project accountable to a schedule.
Knowing the full timeline upfront helps homeowners plan appropriately and removes the pressure that leads to rushing decisions or accepting contractors who aren’t the best fit.